
Redlands Epoxy Floors handles epoxy floor repair across Redlands, CA, serving surrounding cities including Mentone, Highland, Loma Linda, Yucaipa and Calimesa, and after more than twenty years on Inland Empire concrete we have taken off a great many floors that other people put down. This page is about the part that comes before any of that: working out what actually failed.
That order matters more than anything else here. A coating that has let go is a symptom, and the same symptom has several different causes with different fixes. Recoating over an unchanged condition buys the same failure a second time, on your money, usually inside the same span of months it took the first time.
So a repair visit starts with reading the floor rather than pricing a recoat. That costs an hour and it is the hour that decides whether the money you are about to spend buys a floor or buys the same year over again. We look at how the material is failing, where it is failing first, what is behind it, and whether the concrete underneath is still a candidate — and only then does anyone talk about what goes back down.
Peeling in Sheets Is a Bond-Line Failure
When a coating lifts in large, intact pieces that come up like linoleum, the resin did not fail. The resin is fine; you are holding proof of that in your hand. What failed is the interface between the coating and the concrete, and there are only a few honest explanations for it.
The most common is preparation. A slab opened with acid instead of diamond tooling is left with a chemically softened layer, and a coating keyed into a soft skin releases along that skin under the first real load — a warm tire, a pallet jack, a dropped toolbox. Close behind it is contamination: oil, curing compound, or a sealer nobody removed, all of which give the resin something other than concrete to stick to.
The third explanation is moisture pushing from underneath, and it is the one that changes the size of the job. A slab poured before under-slab vapor barriers were routine often sits directly on damp soil, and vapor moving up through it will push a well-made coating off just as surely as a badly made one. Telling these three apart is done by looking at the back of the failed material and at the concrete it came off, not by guessing from above.
Blisters, Bubbles and Pinholes Are Different Problems
They get lumped together and they should not be. Pinholes — small, sharp-edged holes scattered across an area — are usually air pushed out of the slab as it warms during cure, escaping through the film before it sets. That is a placement and timing issue: material applied while the slab temperature was rising, or a mix rolled without an air-release pass.
Blisters are domes, and what matters is what is inside one. Cut a blister open and if there is moisture behind it, you have a substrate problem and no amount of care on the next coat will fix it. Dry blisters point back to solvent or air entrapment, which is a technique correction.
That single distinction decides the scope of the whole job. A technique problem means the affected area comes off and goes back down correctly. A moisture problem means a mitigation system sized to a measured reading, which is a different specification, a different cost and a different schedule. It is exactly why we open one up instead of quoting from photographs.
Reading the Slab Rather Than the Coating
Where the coating is off, the concrete gets tested rather than assumed. In-situ relative humidity probes to ASTM F2170, or a moisture vapor emission rate to ASTM F1869, read against the thresholds in ASTM F710 — the threshold numbers live in F710, not in the test methods, which is where most citations of them go astray. Where the coating is still down and we need to know whether it is worth keeping, pull-off adhesion testing to ASTM D7234 gives an actual number instead of an opinion.
The taped plastic-sheet test in ASTM D4263 comes up constantly and deserves to be understood correctly. It is asymmetric: condensation under the sheet fails a slab outright, but a dry sheet proves nothing at all, because the method is not sensitive enough to clear one. It is a useful first look and a worthless clearance test, whatever a search result says.
A different failure worth naming is the floor that never properly cured — soft underfoot months later, tacky in patches, marking under anything left standing on it. That is not a bond problem at all. It points at the mix, at the conditions the material went down in, or at both: most systems require air, surface and material at 50 degrees or above, a surface at least 5 degrees above the dew point, and relative humidity no higher than 85 percent. A floor placed outside those conditions can look correct on day one and never reach the hardness it was sold with.
Spot Repair, Recoat, or Take It All Off
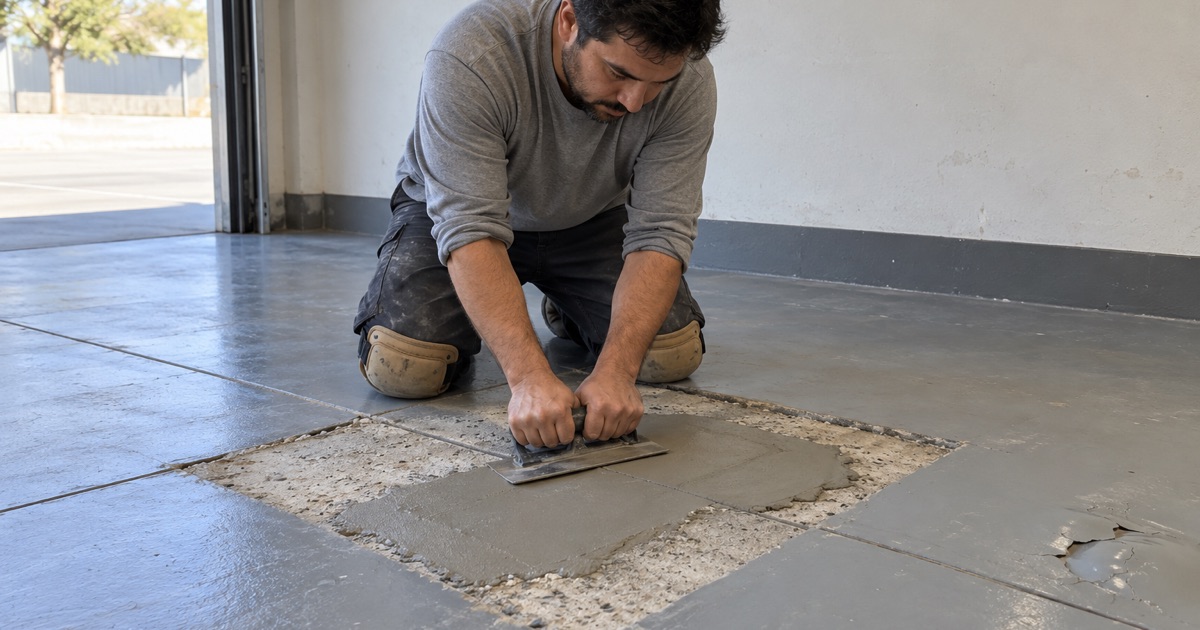
Spot repair is the right call when the failure is genuinely local and the cause is local too: a gouge, an area of impact damage, a patch where equipment was removed, a length of joint whose edges have broken down under hard-wheel traffic. Those get cut back to sound material, rebuilt, and blended in. What we will not promise is an invisible repair — a patch in an aged coating is a different age than the floor around it, and color and gloss shift as a floor lives.
Some of what gets called repair is not repair at all. A floor that has gone dull, picked up fine scratching across the traffic lanes, or stained where something sat on it usually has a sound build with a tired top layer. On those we abrade the surface and put a fresh clear coat over it, which is a fraction of the cost of anything else on this page and restores most of what people are unhappy about. It is worth ruling that in before assuming a floor has failed.
Recoating the whole surface is real and often the cheapest good outcome, but only where the existing system is sound, well bonded and chemically compatible with what would go over it. We test adhesion rather than assume it, because a new coating is only ever as good as what it is stuck to, and a recoat over a failing floor inherits the failure along with the cost.
Full removal is the answer where the bond is gone, where moisture has to be addressed, or where a consumer kit was etched down onto the slab and has been lifting ever since. Removal is a tooling problem before it is a labor problem: PCD tooling shears a soft film off without gouging the concrete, and the grit sequence then steps down to leave a named ICRI concrete surface profile for the next system. Aggressive removal that scars the slab creates a second repair before the first one is finished, so this is the stage where doing it properly saves the most money.
- 20+ Years on Inland Empire Concrete
- Every Slab Moisture Tested
- Free Written Proposals